


These DIY bird feeders are an affordable wedding or party favor perfect for any bird loving event. While I don’t have a wedding any time soon (been hitched for almost eight years now), I do love to make these to give away during the Valentine’s Day season.

Coincidentally, my parents are about to celebrate their 42nd anniversary together.
Hit two birds with one stone. (LOL… I crack myself up… okay.. maybe I wasn’t supposed to be a comedian in this life… maybe the next one…)

With only a few ingredients I purchased at Amazon, I was able to make about 35 of these for only $10 (only .30 a piece).
Here’s what the price breakdown looked like, I already had flour, so this is all I had to buy:
unflavored gelatin $2.5
corn syrup $2.7
Bird seed $6.50
total for 35 hearts : $11.70
Not only do you save money when you create favors on the cheap, but you also create an intimate connection with your guests.
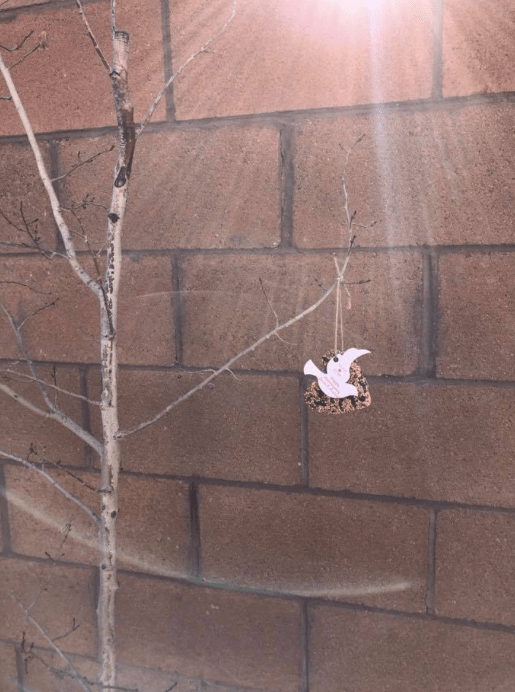
Everyone enjoys bird watching, especially when they can hang the feeder near their balcony or in their backyard. Unlike some wedding favors that are never used, these are sure to be enjoyed. Add a cute custom tag made by Paper Crane Wishes and your event is even more memorable.
Ingredients
1/2 cup flour
1/2 cup water
3 tablespoons corn syrup
2.5 tablespoons unflavored gelatin
4 cups bird seed
Equipment
metal heart shaped cookie cutter
bowl
Large spoon
tinfoil
(1) Combine all the ingredients in a bowl.
(2) Mix, mix, mix until the same color/consistency as in the video below.
(3) Lay tinfoil over a sheet pan and spritz with baking spray.
(4) Spray cookie cutter. Place cookie cutter on tinfoil and fill with the birdseed mixture all the way to the top. (The thicker the heart, the more durable it will be to the elements.)
(5) While the feeder is in the heart cutter, use a pencil to make a hole for the string.
(6) Gently slide the heart out of the cutter and repeat the process for other hearts.
(7) Let dry overnight, or if you are in a rush, bake for 1 hour at 350 degrees, sporadically checking on the hardness of the feeder.
(8) Let cool. Adorn with a cute twine or ribbon to hang. Embellish with tags or any other cuteness.
Like this blog post and want more fun DIY ideas sent right to your email? Sign up for our newsletter and get monthly DIY projects and giveaways sent right to your inbox! I only send emails once a month and jam pack them with giveaways and new DIY projects.
thx so much for reading my blog. Much love and gratitude to everyone who has supported my business whether it be by buying products, following my social media, letting me help with your event, or just sending positive vibes my way.
xoxo
Amy
